


 border="1">
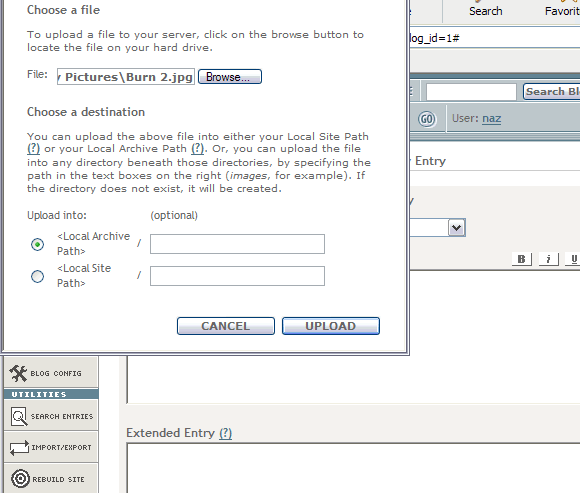 width=580>
 width=412>
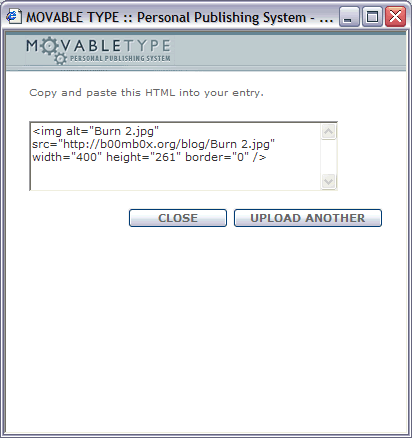 width=412>Finish writing and uploading images until your entry is complete. At the bottom of the page Choose SAVE occasionally. Make sure the dropdown menu is set to PUBLISH not DRAFT.


Powered by
Movable Type 2.661
|
|
|
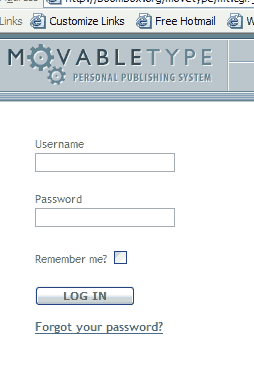
Using Movable Type Movable Type is a content management system which allows the user to publish text and images to a website without having to use HTML. Go to http://b00mb0x.org/movetype/mt.cgi to log on. Login using your username and password.
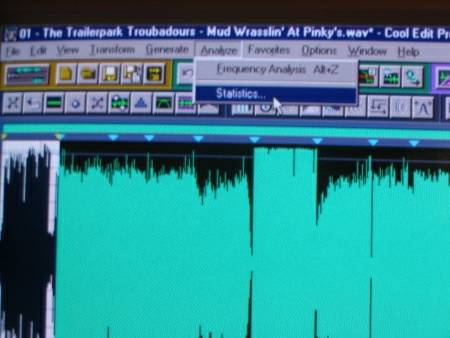
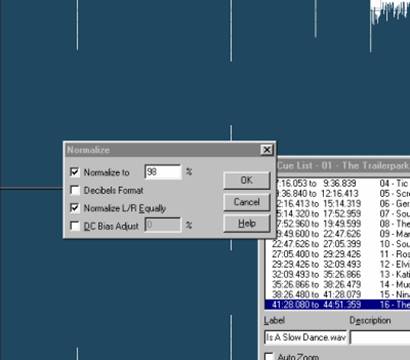
The text on which this tutorial is based was originally posted by Younglove on the Syntrillium board at http://www.audioforums.com/ A friend and I reworked the original instructions slightly, hopefully to make it easier to follow. I do not pretend to understand all this stuff. I asked a couple of audio guys if it made sense and they said it did. RMS stands for Root Means Squared, so RMS Normalizing is normalizing to the Root Means Squared (ha ha) rather than to peak (which the Normalize function does). This gets the output levels sounding all the same (close anyway). It works for me, and while a little tedious I find it takes less time in the long run to do this procedure. So, here's the manual procedure for RMS Normalizing in CEP 1.2 and CE2000: If you wish, to save time...Disable Undo
|
| September 12, 2004 | tutorials | Removing Light Hiss With Cool Edit Pro |
REMOVING
LIGHT HISS IN 8 EASY STEPS
by
umboto
So, you have a song on tape which you really really want to include in your next mix. You record it onto your hard drive, and give it a listen. It's pretty good, except for that pesky tape hiss. This little procedure will clean up the hiss with very little signal loss. We're going to reduce the track to nothing but hiss, save the hiss to a clipboard, invert it and mix paste onto the track. When it plays back, the inverted hiss will cancel out the hiss you hear. If you wish to stay on the safe side, work with a copy of the track, keep your original just in case. OK, here we go...
1. Open the file you wish to clean up.

2. Edit - Convert Sample Type (we're going to work with a 32 bit float).
When the window opens, on the right side, under 'Resolution', select 32, then click OK.

3. Transform - Noise Reduction - Hiss Reduction
Or, this shortcut:
Select 'Light Hiss Reduction'. If you are dealing with a lot of hiss, try either 'Standard' or 'High' reduction, but keep in mind the more aggressive you are, potentially you will lose more actual signal. (Losing some of those highs and lows) So be willing to experiment.
Check 'Keep Only Hiss'

then click 'OK'.
4. Edit - Copy (Save to clipboard)
5. Undo the hiss reduction
6. Edit - Mix Paste
Make sure 'Lock Left/Right' is checked
Check 'Invert'
Make sure 'From Clipboard' is checked.
Make sure Overlap (Mix) is checked.

Click 'OK'.
7. Edit - 'Convert Sample Type' (back to 16 bit).
This time, make sure '16' is selected in the 'Resolution' window.

Click 'OK'.
8. Save the file, you're done!
| September 09, 2004 | tutorials | How to compress a mix |
How to Compress Your Mix for b00mb0x
Ingredients
You'll Need
-
CDex (freeware)
a mix
I should mention at the front of this tutorial that if your mix isn't compressed enough for the site, we'll compress it for you. So if you don't want to learn this; please go about doing whatever you've been doing. If, however, like the young moth who yearns to cocoon in study so he may one day flourish like a butterfly, you would like to learn this yourself and save us the time... well here ya go:
When saving your mix in whatever program you have used, you want to save as a WAV file. NOT as an mp3 file. Save this file somewhere temporary where you can find it. It will be quite large.
Now, download, install and run CDex.
This is the program you will be using to compress your mix.
We need to adjust your encoding settings (how the mp3 will be compressed). This will be one time only if you will only be using CDex to compress mixes for our
site:
Select Options from the top menu, then select Settings. (Or just
hit your F4 key)
Select the Encoder tab (it should be auto-selected the first time this window opens) and change the settings to look like below: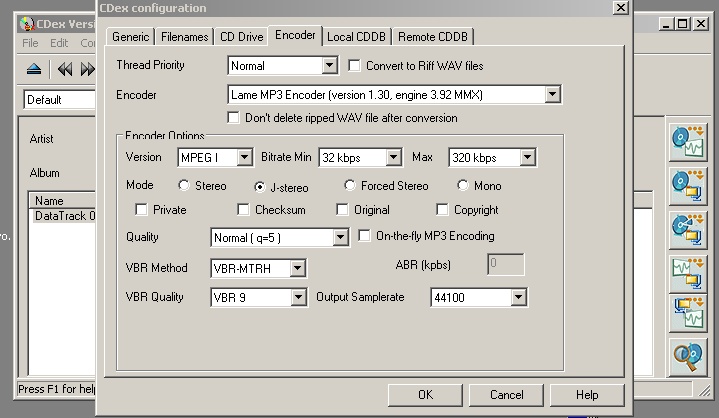 width=719>
CDex Configuration Settings for b00mb0x Thread Priority - Normal - Normal should be fine for you. Setting this higher will allow your mp3 to encode fast, but at the expense of the rest of your computers performance. Encoder - LAME MP3 Encoder
|
For the record, if you want to save your mix at a higher quality for your own purposes, all of these settings apply for the most part. A decent higher quality setting without giving away the file-size cow is to keep all the above settings, but change Quality to High (q=2) and change VBR Quality to VBR 2. For super-bestest-ever quality change to VBR 0 but at that point, why not just keep the WAV file you freak?
Now hit the Filenames Tab.
Next to Wav-->MP3, hit the triple dot button (...). Select
the folder where you want your mix to be saved once an mp3. Pick somewhere you can easily find it (like Desktop).
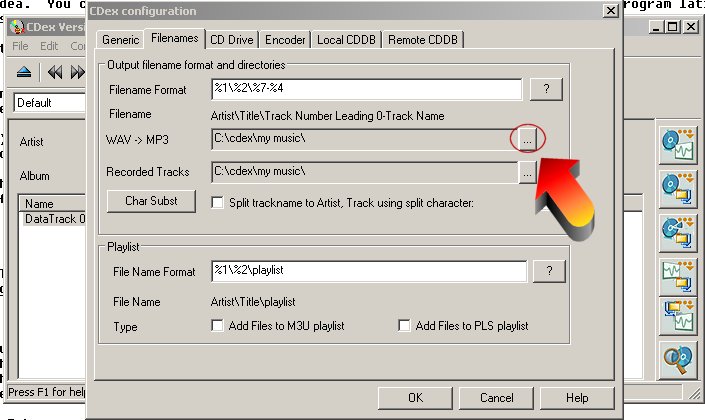 width=705>
Now you have your settings ready. Click OK.
You now want to select, from the buttons on the right side, the fourth large button from the top (the third from the bottom). The popup text will say for this button "Convert WAV File(s) to Compressed Audio File(s)" class=italics>(Below pic - 1.).
A windows will popup where you now must find where you saved your WAV file. Hit the triple dot (...) button next to Directory
class=italics>(Below pic - 2.).
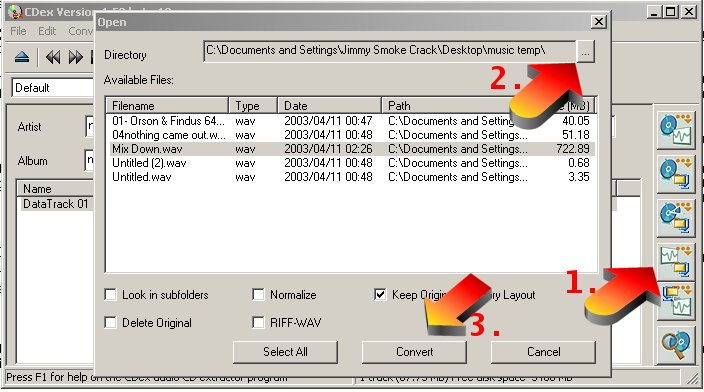
Find the folder your WAV file is in and select it. All WAV files in that file will be shown now in the window below. Highlight your mix and hit the large
CONVERT button on the bottom (Above pic -
3.)
If you have an ancient processor like mine (300mhz Celeron), go get some dinner as this will now take 2 hours.
Tutorial by assorted
| August 30, 2004 | tutorials | Downloading mixes |
There are numerous ways to get mixes. The simplest and easiest is to download them from the links presented on this site. To download a mix from a link on this web site; you probably have to RIGHT CLICK OVER THE LINK AND SELECT 'SAVE AS.' This is the fault of how the Internet Explorer browser handles links to mp3 files so complain to Microsoft not me.

However, as the files are large you probably want to get a download manager. These programs take over your web downloads and allow you to automatically resume; therebye making sure you will get the files finished and complete. Just pressing the link on a large file (especially if you are dialup) is very likely to result in your not getting the file at all. The download manager needs to support refereers.
|
Join our announcement list to find out when
new mixes are available.
|